Wallets
Setting Up a Wallet Connection
To connect to a wallet, tap on + Add New Wallet. You will be redirected to a new screen where you can either manually enter the connection details or scan the node’s QR URI to autofill the required fields.
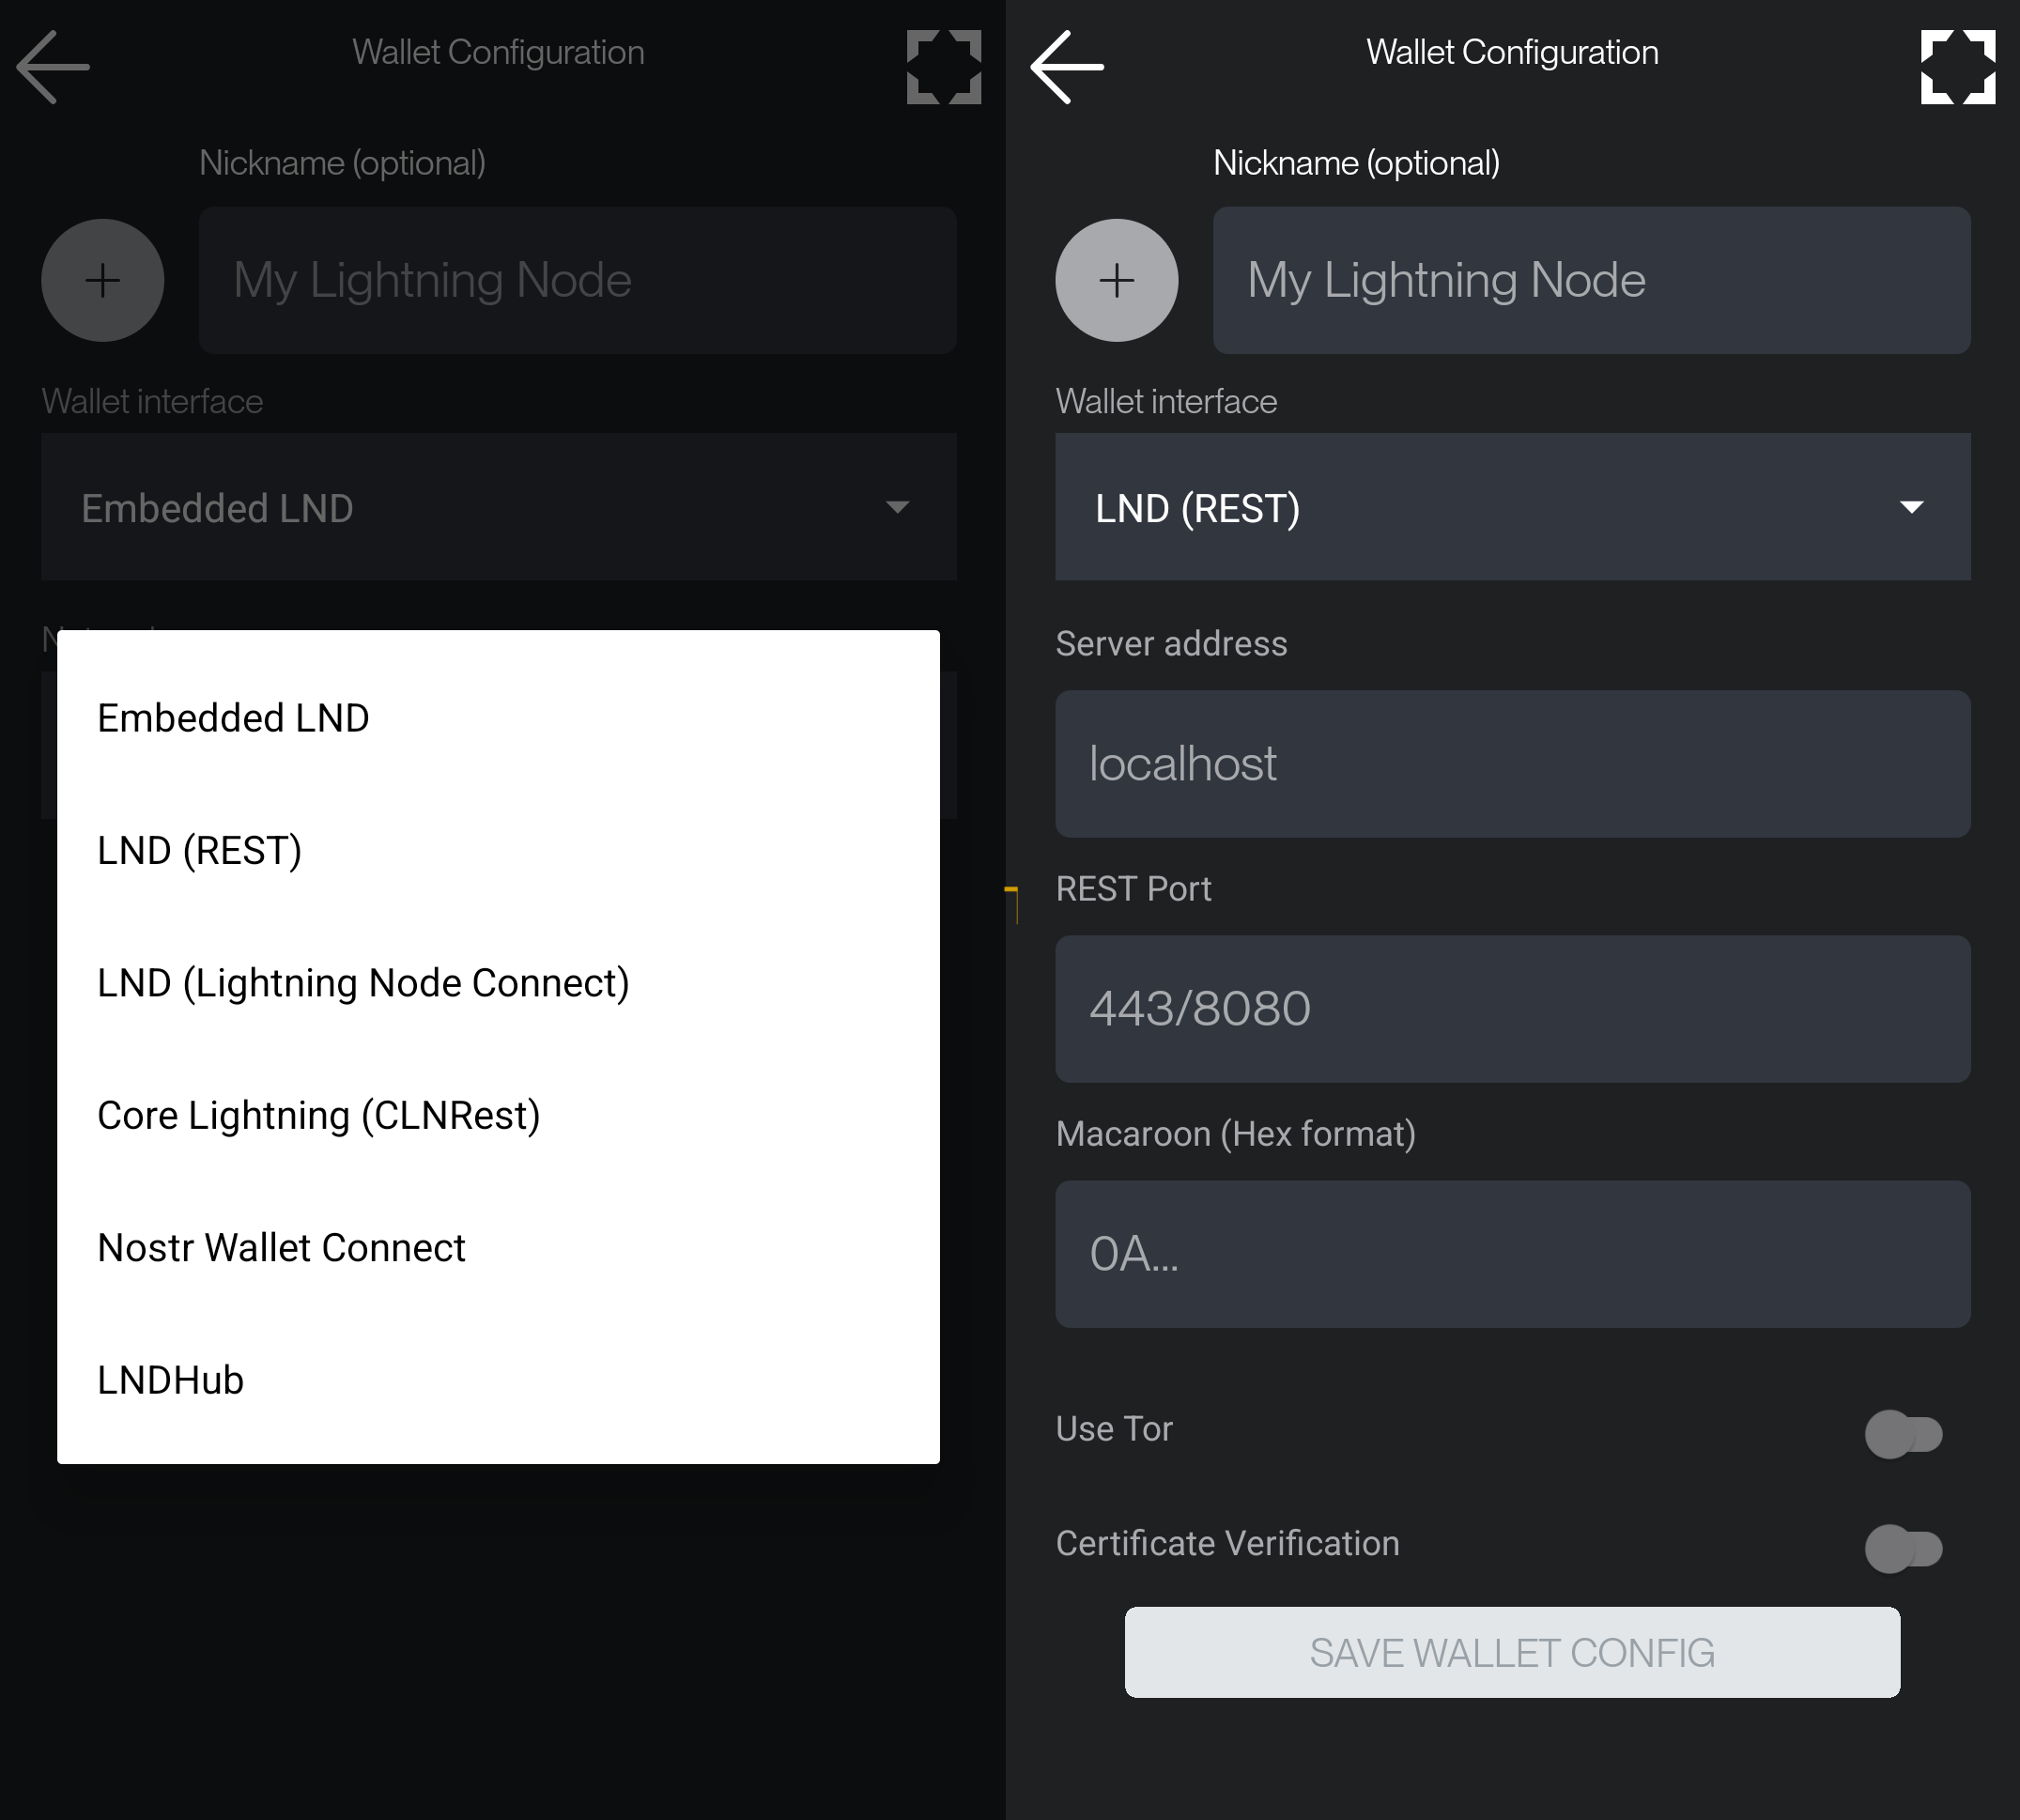
Assign a nickname to your connection for easy identification. Tap on the circle icon next to the nickname to set a custom wallet picture. Then, choose the appropriate wallet interface from the available options:
- Embedded LND
- LND Rest
- LND (Lightning Node Connect)
- CLNRest
- Nostr Wallet Connect
- LNDHub
If your wallet operates on the Tor network, ensure that you enable the Use Tor option.
Managing Wallet Connections
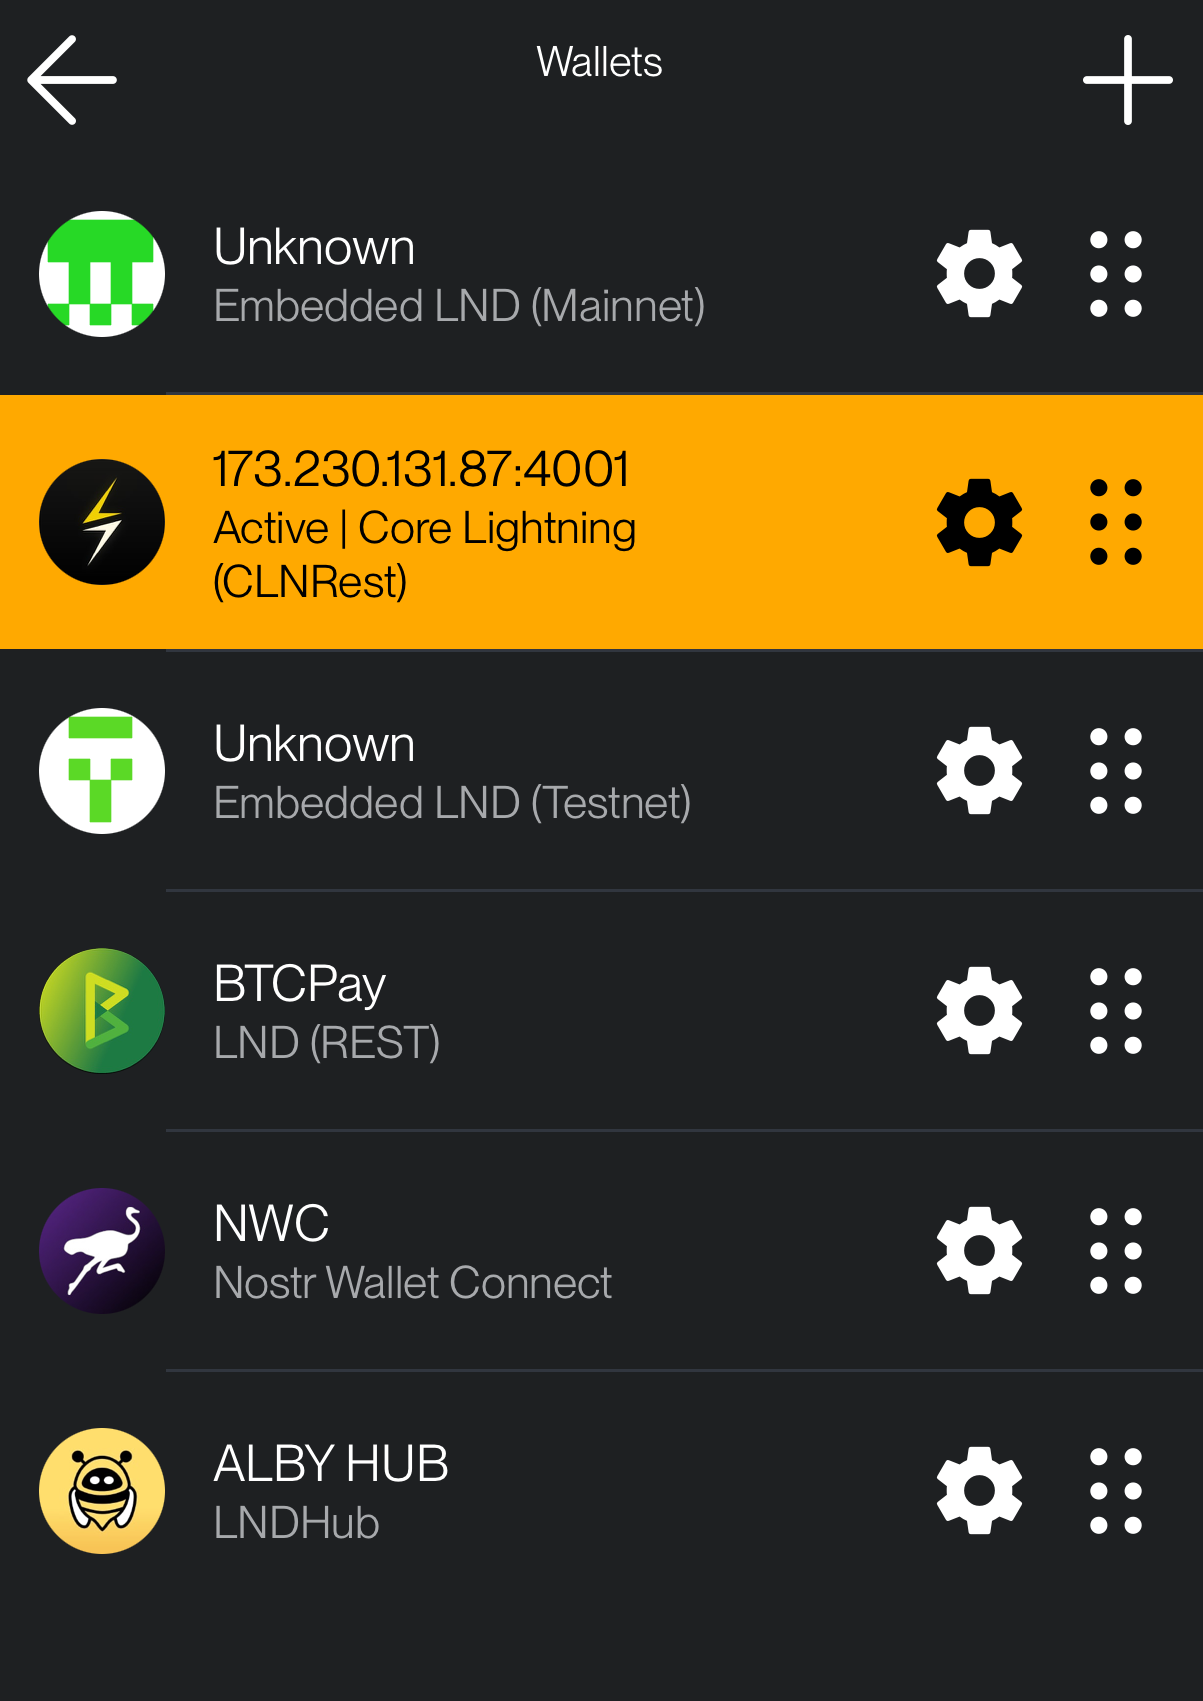
Once you've set up multiple wallet connections, you can seamlessly switch between them without interference. Each wallet functions independently, whether connected via Tor, clearnet, Tailscale, or a local IP. ZEUS will automatically establish the connection without requiring a restart.
However, if switching from a clearnet connection to Tor, it may take some time for the Tor network to bootstrap your relays—so a little patience may be needed.
Operations
- Select an existing wallet by tapping on it. You will be redirected to the main screen while ZEUS establishes the connection.
- Edit an existing wallet by tapping the settings icon (⚙️) next to it. This will open the wallet’s configuration menu, where you can modify the settings or delete the connection.
- Rearrange wallets by holding and dragging the drag icon (≡) next to each wallet. This allows you to change the order of your wallets as per your preference.
- Backup and Restore (Coming Soon): A future update will allow saving wallet configurations to a file for easy migration to a new device.